

Tips & Tricks for Heat-Set Inserts Used in 3D Printing
Why Use Threaded Inserts?
Threaded inserts not only look great in 3D-printed parts, they also have a practical use. Everyone has had a device that was assembled with screws. After disassembling and reassembling it a few times, you realize that if the screws dug directly into the plastic, they won’t hold anymore. Each time you screw the parts together, the material gets plastically deformed at the threads, which eventually leaves you with nothing but a ragged hole where nothing can grab. This is where thread inserts come into play. By melting them into your parts, they are positively bonded to the plastic and no longer move. The screws are now turned into durable and also low-friction brass and thus will last forever.
Using inserts also results in the strength of the connection being increased, as the thread insert is connected to more material, compared to directly screwing into a smaller plastic hole.
Another point is also the reliability of the connection. If a screw gets turned directly into the plastic and is slightly overtightened, the threads in the plastic will often shear off and any strength of the connection will be lost. Standard length inserts are typically designed to withstand more torque than is normally required for a screw connection and are therefore rarely overtightened.
HOW TO DESIGN FOR INSERTS?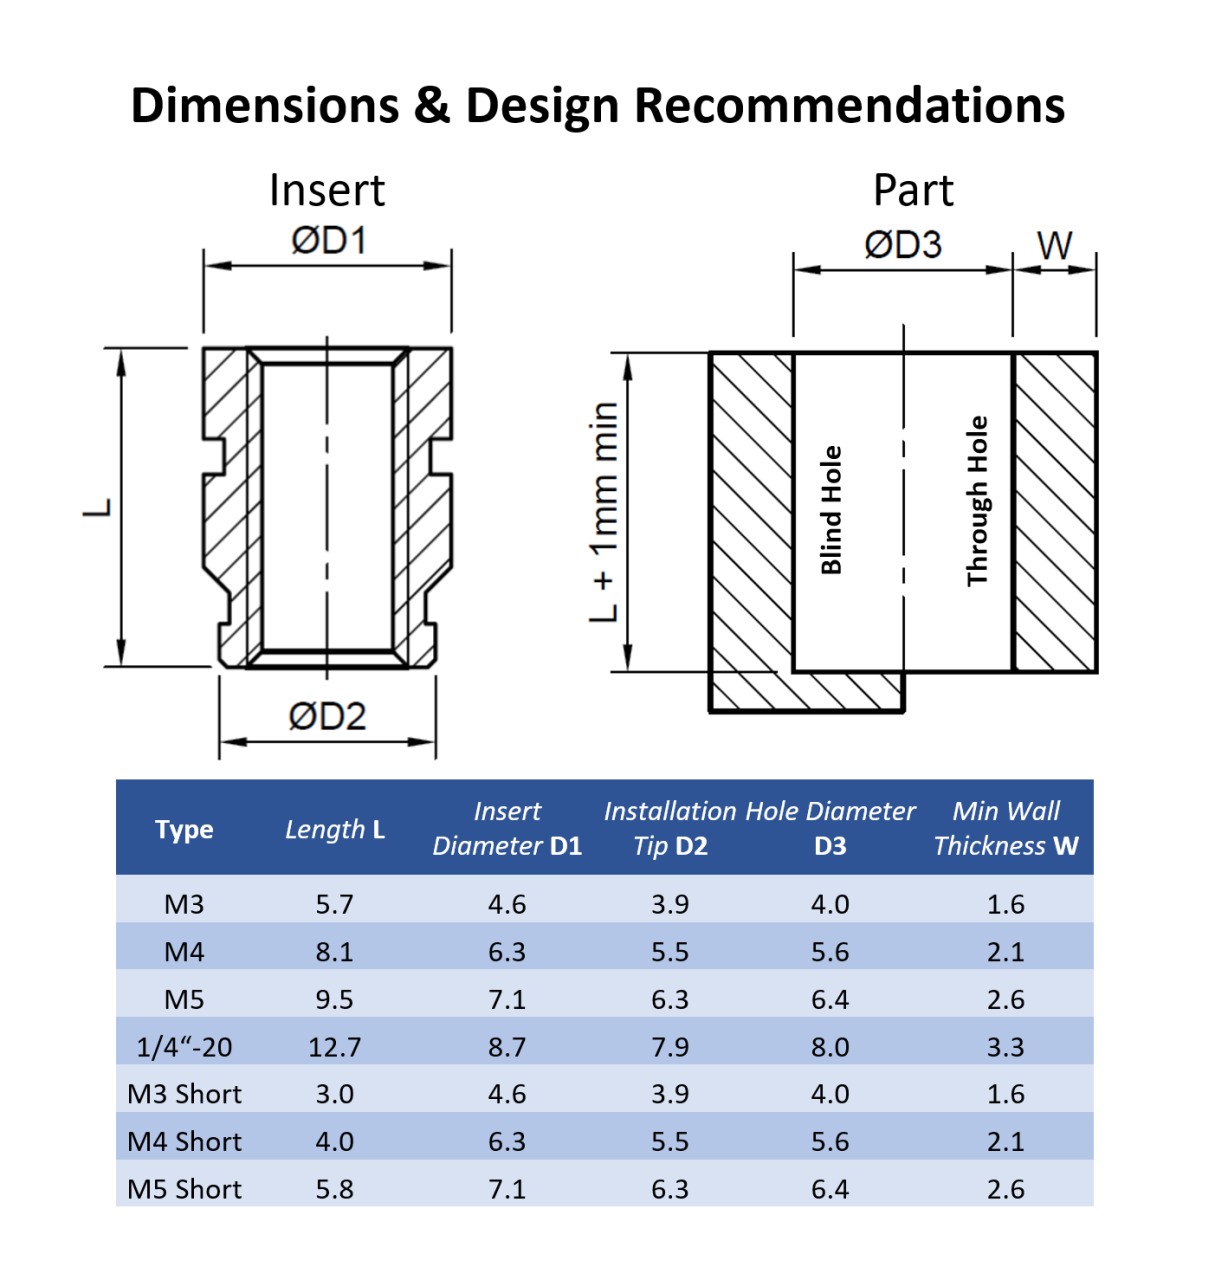
If you want to use threaded inserts in your parts, there are only a few things you need to keep in mind when designing. The critical dimensions are summarized in the table next to the article and here are some more tips:
The bore diameter must be adapted to the threaded insert used. It should be just large enough so that the installation tip can be easily inserted and that no burr remains under the insert after melting. Since holes in 3D printed parts usually come out smaller than in CAD, a test specimen is linked further down in the article, with which you can determine the appropriate diameter in various printing orientations
A blind hole should be slightly deeper than the length of the insert (approx. 1 mm)
Through holes do not need to be longer than the insert
To ensure strength you should make sure to stick to the minimum wall thickness
Holes should be straight (not tapered)
Normally, no chamfer is required at the hole edge
Get a Quote for Your 3D Print
Upload a 3D CAD file to us at :sales820@xy-global.com.
Our team of engineers will be the first to contact you and analyse your project. If you have any questions about the quote or design, you can also work with our application engineering team who will help guide you through the process.